
Whether you choose to play the original Japanese text or the patched English text of .hack//fragment, if you want to play on your PC or laptop, you will need a PS2 emulator to play the game. There are many programs that can emulate PS2 system, but so far only one can emulate the PS2 network adapter. PCSX2 has many versions, the older 1.4 and (at the time of writing this) the stable version of 1.6. These versions are 32-bit and can work on Windows 7, 8, and 10.
Versions 1.4 and 1.6 both use "plugins" for when it comes to emulating nearly everything from graphics, controllers, sound, CD/DVD player, USB ports, and the network adapter which is the most important part of going online. These are abbreviated as GS, PAD, SPU2, CDVD, USB, and DEV9 in that order. By default the included plugins for GS, PAD, SPU2, and CDVD are fine. However the plugins for USB and DEV9 that are included are blanks, placeholders, that go by the name "null" meaning nothing. You must supply the plugins, which we will cover.
But before that we must talk about BIOS (basic input output system), essentially the firmware for the PS2 console for various regions around the world. We can not supply you with the BIOS, and obviously the .ISO file for .hack//fragment; both for copyright law reasons. But we can tell you how to make your own, or you can go about your own and find other ways.
If you haven't already, head on over to PCSX2's downloads page and download the latest "Stable Version" aka 32-bit Portable 1.6.0 version (you can get the installer version but we'll be covering the portable version in this guide). If you still have the 1.4.0 version, everything in this guide still applies just the same (you can still get 1.4.0 on the downloads page, press the Show Previous Versions button to see it).

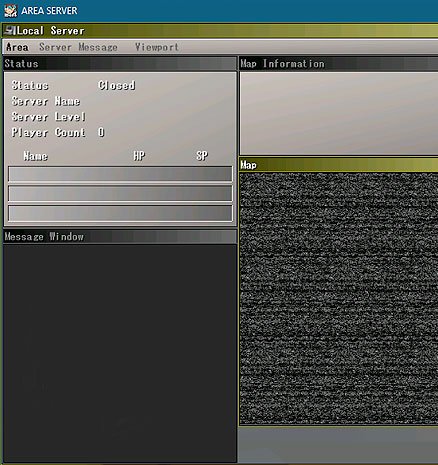
This is the main interface for PCSX2.
Once you've installed or run the executable file pcsx2.exe, you'll be prompted with this welcome message. And now we begin the setup for this emulator.

Press the next button to move onto the next page, this is the plugin's page.

Click on the Open In Explorer button to be taken to your plugins folder, keep this open as we will be dropping files from the next steps.
Download these two files
They both will be a compressed ZIP file, you will need to extract the files inside them. The files inside will be a .dll file extension named CLR_DEV9.dll and CLR_USB.dll
If you hit < Back and then hit Next > again, the page will refresh with the two files will showing up as a selective option for USB drop menu and DEV9 drop menu. Make sure to select the two as shown below.

On the next page, you'll see the BIOS selector. But you do not have any BIOS files in your bios directory. You can acquire a BIOS legitimately by copying over yours from your Playstation 2 console. You can download a BIOS dumper from PCSX2's setup guide. Otherwise if you choose to acquire one through other means, we will not be providing links or how to acquire them. After you've acquired your BIOS files, click on the Open in Explorer button and copy/paste your BIOS files to this directory.

Now press the Refresh button to see your BIOS files listed. Select the file and press Finish at the bottom.

After that, the main parts are now done and we can move on closer to starting the game.
First let's enable your network adapter by going to Config at the top then Dev9 menu, expanded click on Plugin Settings...

You will see a tiny window that says Enable Ethernet, make sure this is checked for yes.

Now click on Options across from Enable Ethernet.

At the top we have Connection Method, if you have the option for Sockets or Winsock, select this option. If you have neither or nothing, you can install Npcap Installer from https://npcap.com/#download as an alternative. Then come back to this screen and you should have the options for PCAP Switched and PCAP Bridged, choose PCAP Switched. Reminder, this is an alternative option if you do not have Sockets or Winsock, always use those first.
The next line is Adapter, you can leave it at Auto - Autselected adapter, however if your computer is hooked up to the internet though wi-fi and ethernet, you may want to manually choose one.
The other options for Intercept DHCP should be left unchecked. You should never have to change PS2 IP Address, that is unless you have two or more PC's running .hack//fragment at the same time, you can check Intercept DHCP and type in manually an IP for each PCSX2 running .hack//fragment on your home network, be sure each LAN IP is not being used by anything else on your home network, that also means the LAN IP from the PC you are playing on as well.
Hit Apply and let's move on.
Now we need to choose the .hack//fragment file you created from the English patch or the original Japanese setup guide. From the main menu choose CDVD then ISO Selector and Browse...

Find your ISO disc image from your computer and make sure it's been selected as shown below. Your version may vary at the time of you reading this guide.

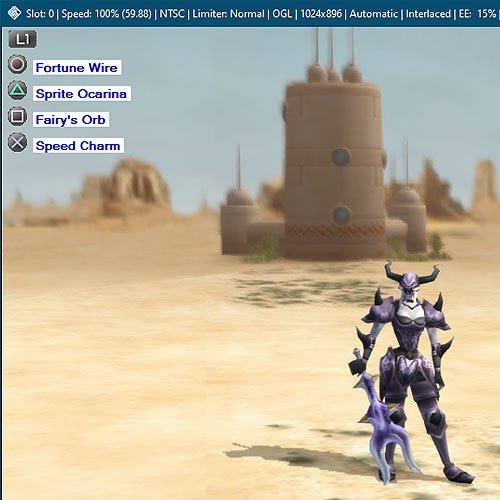
Select System from the menu bar and choose Boot ISO (full) to launch the game.

Congrats, you have successfully patched the game and now launched the game. All that's left is to configure your network settings and save it to your memory card, which we will cover in the guide Setting Up Network Config Memory Card Save.
Now we'll cover how to enable your keyboard to type in-game.

First go into Config then USB then Plugin Settings...

From the drop menu under Device in Port 1 change No Device to Keyboard.
If you were to click on Config on this screen, you will see this window.

By default the Translate Input should be kept as No, and the Use API should be kept as Windows Messaging. These default options are fine and you need not change them.
Then press Ok and you are done.


Recommended Comments